Home   Calling Plans   Service Terms   V.O.I.P. Help   P.I.D. FAQ AFFILIATES   RATE PLANS   Privacy Policy    SOFTPHONES FAQS   FEEDBACK


    • No computer or Internet access required:
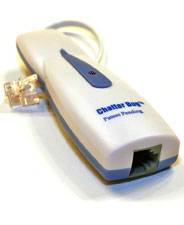
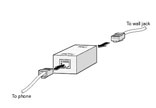
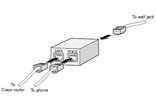
      OUR CHATTERBUG P.I.D. plugs into the analog phone line between the handset and the wall jack.

    • No headphone or microphone needed:
      OUR P.I.D. uses any ordinary Touch-Tone phone.

    • Works with cordless phones systems:
      Once installed, all cordless phone extensions may make long-distance calls for $9.95 per month.

    • Works in any two locations:
      Primary and vacation residences. Simply register both phone numbers where you wish to use the OUR P.I.D.. In future generations, you'll be able to take the OUR P.I.D. with you when you travel.

    • Works during power outages:
      OUR P.I.D. draws power solely from the phone line and keeps working during power outages.

    • 911 service:
      OUR P.I.D. interfaces with your local phone service. You receive exactly the same 911 service as you did before the device was installed.

    • No security concerns:
      OUR P.I.D. attaches to an ordinary phone line, so there are no increased security risks.

    • Takes advantage of 21st Century technology :
      OUR P.I.D. takes advantage of 21st century technology without additional equipment expense.


    Connections Setup Hints

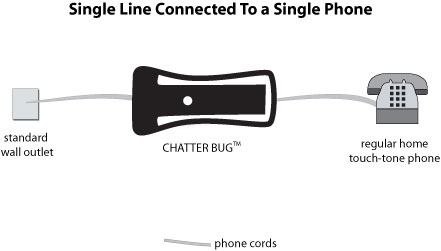
    Single Line Connected to a Single Phone

    Connecting OUR P.I.D. device to a Regular touch tone Phone using single Phone line (one number)

    Do the following steps in order to setup your connection and plugs:

    1.    Disconnect existing phone cord from the back of the Touch Tone Phone

    2.    OUR P.I.D. has a short phone cord coming out of one end that you plug it into the back of the Phone

    3.    Plug the phone line coming from the wall into the back of the OUR P.I.D.

    4.    See Figure below for more information
    graphic


Two or More Lines on the Same Phone

Connecting OUR P.I.D. device to two or more lines (different phone numbers) using the same Phone

Do the following steps in order to setup your connection and plugs:

1.    Disconnect existing phone cords from the back of each regular Touch tone phone

2.    Choose one out of two phones in order to use for placing calls

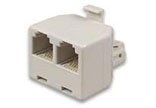
3.    Plug the phone lines coming from the wall into the same RJ11 Splitter

4.    OUR P.I.D. has a short phone cord coming out of one end that you plug into the back of the selected phone

5.    Plug the other side of the RJ11 Splitter into the back of the OUR P.I.D

 
graphic

Base and Several Handsets

Connecting OUR P.I.D. device to a Base Phone with several Handsets using single Phone line (one number)

Do the following steps in order to setup your connection and plugs:

1.    Disconnect existing phone cord from the back of the Touch tone Base Phone

2.    OUR P.I.D. has a short phone cord coming out of one end that you plug into the back of the Base Phone with multiple handsets

3.    Plug the phone line coming from the wall into the back of the OUR P.I.D.

4.    See Figure below for more information

graphic


Phone with Digital Subscriber Line (DSL)

Connecting OUR P.I.D. device to a Phone using DSL; which needs Asynchronous Digital Subscriber Line (ADSL) Filters and Splitters:

ADSL Filter passes voice band, rejecting ADSL data.

ADSL Splitter separates voice from data, with a connection for each.

Do the following steps in order to setup your connection and plugs:

1.    Disconnect existing phone cord from the back of the Touch Tone Phone

2.    OUR P.I.D. has a short phone cord coming out of one end that you plug into the back of the Phone

3.    Plug the phone line coming from the wall into the Input port at the back of the ADSL Splitter

4.    Plug a phone cord from the ADSL Splitter Voice output into the back of the OUR P.I.D., this if you are not using an ADSL Filter cause it will reject the data coming; So either you use a Filter or a Splitter.

5.    Plug a Cable from the ADSL Splitter Data output into the PC Modem or Router

6.    See Figure below for more information

 graphic


Phone over IP

Connecting OUR P.I.D. device to a Phone over IP using single Phone line (one number); this will need a Voice Over IP Adapter, which is used to connect the phone or fax machine to a router or gateway using the standard telephone jacks.

Do the following steps in order to setup your connection and plugs:


1.    Disconnect existing phone cord from the back of the Touch Tone Phone

2.    OUR P.I.D. has a short phone cord coming out of one end that you plug into the back of the Phone

3.    Plug the phone line coming from the wall into the back of the VOIP Adapter

4.    Plug a phone cord from the Voice output of the VOIP Adapter into the back of the OUR P.I.D.

5.    See Figure below for more information

graphic


PBX system using Single line

Connecting OUR P.I.D. device to a Private Branch Exchange PBX system connected to a single phone line (one phone number)

Do the following steps in order to setup your connection and plugs:

1.    Disconnect existing phone cord from the back of the regular PBX

2.    OUR P.I.D. has a short phone cord coming out of one end that you plug into the back of the PBX; you might need an RJ11 Connector to do that.

3.    Plug the phone line coming from the wall into the other side of the OUR P.I.D.

4.    PBX is originally connected to Multiple Phones

5.    See Figure below for more information

graphic


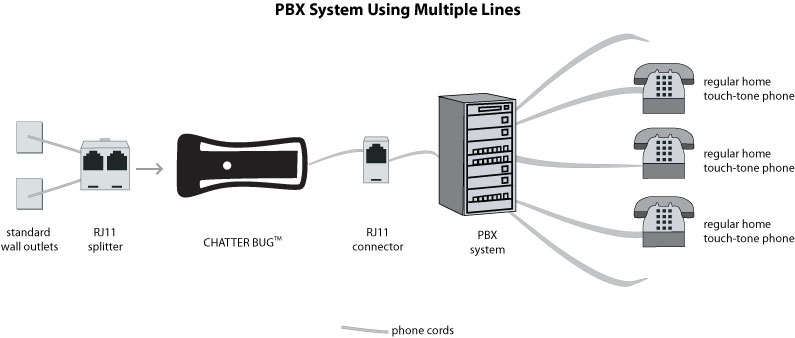
PBX System using multiple line

 Connecting OUR P.I.D. device to a Private Branch Exchange PBX system connected to multiple lines (different phone numbers)

Do the following steps in order to setup your connection and plugs:

1.    Disconnect existing phone cords from the back of the regular PBX

2.    Plug the phone lines coming from the wall into the same RJ11 Splitter

3.    OUR P.I.D. has a short phone cord coming out of one end that you plug into the back of the PBX; you might need an RJ11 Connector to do that.

4.    Plug the other side of the RJ11 Splitter into the back of the OUR P.I.D.

5.    For this Scenario to work properly, you should register the multiple phone lines (numbers) that you are going to use on the same OUR P.I.D. device Serial Number

6.    See Figure below for more information

graphic


Base and Several Handsets

Connecting OUR P.I.D. device to a Base Phone with several Handsets using single Phone line (one number)

Do the following steps in order to setup your connection and plugs:

1.    Disconnect existing phone cord from the back of the Touch tone Base Phone

2.    OUR P.I.D. has a short phone cord coming out of one end that you plug into the back of the Base Phone with multiple handsets

3.    Plug the phone line coming from the wall into the back of the OUR P.I.D.

4.    See Figure below for more information

graphic


LIST OF FIGURES USED HERE

Description

Logo

ChatterBug PID Device

graphic

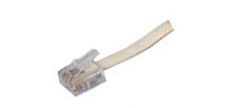
RJ11 Plug

graphic

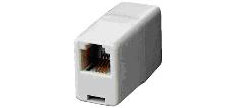
RJ11 Connector

graphic

RJ11 Splitter

graphic

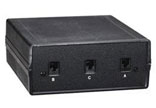
RJ11 Switch

graphic

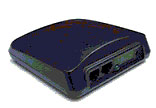
Voice Over IP Adapter;

Used to connect the phone or fax machine to a router or gateway using the standard telephone jacks

graphic

Asynchronous Digital Subscriber Line (ADSL) Filter;

It passes voice band, rejecting ADSL data.


graphic

Asynchronous Digital Subscriber Line (ADSL) Splitter;

It separates voice from data, with a connection for each.

graphic

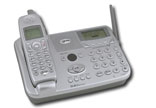
Phone with a Digital Answering Machine

graphic

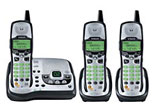
Phone System With 3 Handsets

graphic

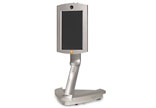
Video Phone

graphic

Phone with Fax Machine

graphic

Private Branch Exchange (PBX)

graphic

Modem

graphic

LEARN MORE P.I.D. FAQ'S                     ORDER NOW